Sunday 14 June 2015

Can you find the birdfeeders?

The Eco Art Team chose the front school garden to place our nicely decorated birdfeeders.


Sunday 24 May 2015

Bird Feeders

We were on a mission 2 weeks ago, trying to attract honeybees, butterflies and humming birds with Echinacea flowers. This week, we want to attract birds to our community garden. We decorated bird feeders in hopes of feeding hungry birds throughout the spring season. Take a look at this website for more ideas on how to create an eco-friendly bird feeder from tin cans, marbles, old dishware, moss, bark, pine cones, twigs, popsicle sticks, and more!
http://www.craftionary.net/make-birdhouses-garden/

Enjoy!


Pinwheel Pencils

We got crafting this week by making pinwheel pencils. They are a unique combination of a windmill on a pencil. These pencils now give us inspiration to write.


How to make Pinwheel Pencils:
 
You will need:
-Paper
-Pencil with an eraser tip
-Scissors
- Markers, crayons and/or glitter
-Push pin
 
Get crafting
1. Cut your chosen paper, card or foam – use coloured, patterned or plain – into a 10cm (4in) square.
2. Fold it diagonally each way from corner to corner creating a cross through the middle. Mark 2cm (1in) from the centre point on all four lines.
3. Cut along the lines but stop at the marked point. Do not go through the middle.
4. If you’d like to decorate, add sticky sections using the Glue Stick, and shake glitter over them.
5. Once dry, poke holes in every other corner with the drawing pin (you may need to help your child do this).
6. Take each corner with a hole and fold it towards the centre. Push the drawing pin through each hole and the centre of the pinwheel and into the wood or eraser of the pencil (again, help your child to do this).
7. Make sure the pinwheel isn’t touching the pencil or it won’t spin properly.
Enjoy!

For all the visual learners (like myself), here is a DIY video:
https://www.youtube.com/watch?v=4ox88B8yjWQ

Enjoy!

Monday 27 April 2015

Who We Are?

We are ordinary students who are enthusiastic about art and the environment alike and need a canvas to express ourselves. Our canvases are egg cartons, plastic bottles, newspaper, among other reusable materials we find in our homes or are donated to us for re-use. We are eager to learn and help make our school a more beautiful and welcoming home for all of us. Please leave us comments for ideas or projects you wish us to take on. Merci!

Here we are in our tie dye shirts.


The Clairlea Hive!

As an eco school initiative, we are raising awareness about the colony collapse disorder of honey bees. They are not only dying, they are disappearing.

Bees are amazzzing!
They have much to teach us, they fascinate us, they are beautiful, and their importance to humans is beyond words. Honey bees, especially, are associated with the production of 1/3 of the worlds' food for humans (through pollination, but also honey), healing, and perhaps more than any other creature- if not the only creature, held up as setting a selfless example to humans on happy and successful communities. If we are able to work collaboratively, then we can share some of the success of the honey bee. Only that the result of honey tastes much sweeter.

So, we created our own Clairlea hives out of egg cartons, paper masher, newspaper, cardboard, and balloons. It was a team effort between the Eco Art club and students in Room 111.


Tie Dye Shirts in the Making

We decided to reuse old shirts we had at home to make our very own, unique, colourful, and bright team shirts.
There are several techniques to tie dye (e.g., linear, zigzag, dotted, etc.). We used the spiral tie dye technique.
Instructions:
1. Put your thumb and index finger in the center of the shirt.
2. Begin moving them in a circular motion, spiraling the shirt around the center point.
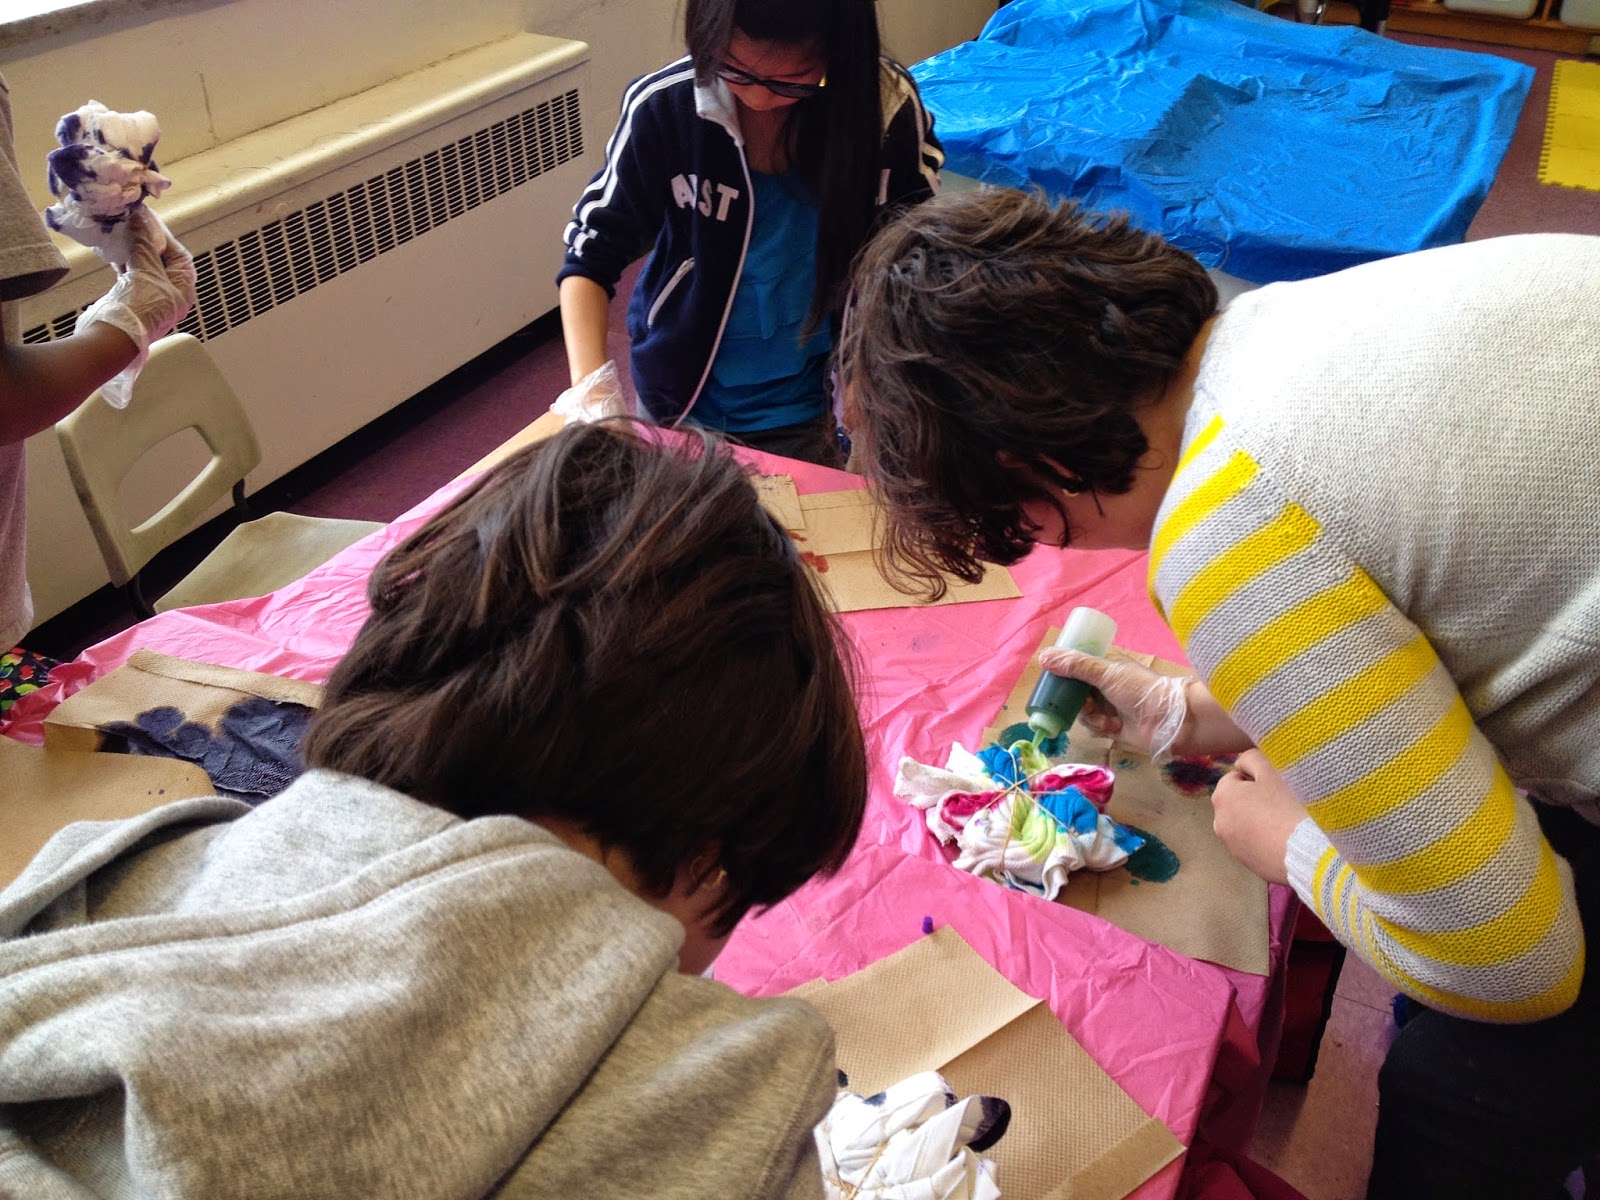
3. When you have spiraled the entire shirt, use large rubber bands and place on shirt like "pie slices".
4. Apply tie dye colours in different compartments.
*Be careful to not mix undesired colours (i.e., green and orange would make brown).
5. Leave in a damp plastic bag for 6-8 hours.
6. Wash shirt in sink until the water runs clear.
7. Hang dry, preferably in the sun for best results.

Ta da!


Welcome/Bienvenue!

The Eco Art club is a passionate team that aims to promote recycling through art. Their resulting art work is really impressive!

Stay tuned for pictures...